Over the last couple of months, we ran some experiments with sugarcane propgation.
This fall, we harvested our sugarcane and set to work on putting in more.
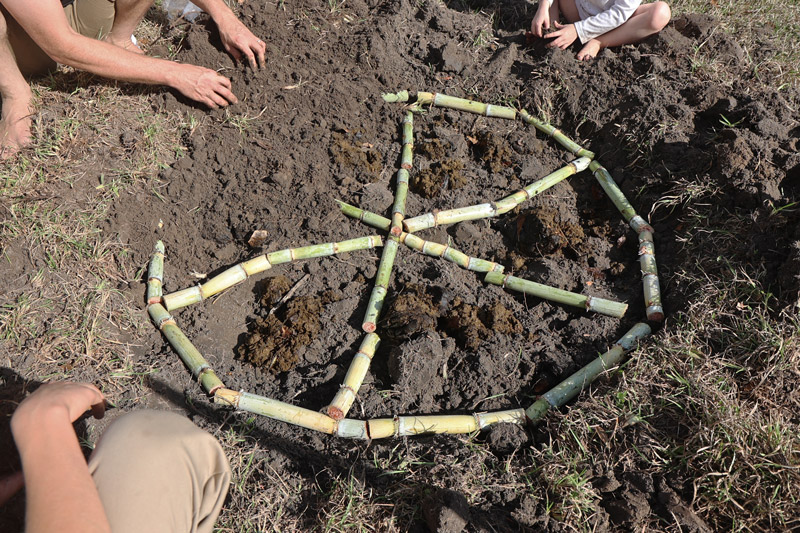
We planted six more sugarcane wagon wheels:
And my daughter sold some sugarcane on Etsy.
Yet the biggest thing we wanted to do with sugarcane was to propagate it in the nursery so we could offer pots of it for sale in the spring, as well as have lots more plants we could later make sugarcane syrup with.
In the past, we grew a few pieces of cane in pots by cutting up chunks with a couple of nodes and sticking them into soil in my greenhouse. That worked, but it still took two nodes.
Perhaps there was a better way? The best way to find out was to conduct an experiment.
The Sugarcane Propagation Experiment
I searched through some articles online and found mostly commercial sugarcane growing information, and then went to YouTube to see how gardeners might be micro-propagating sugarcane.
If we could use individual nodes to start plants, we could start many more plants from each stick of sugarcane than if we were to use the commercial method of dividing them into segments with three or four nodes each.
Yet there is a possibility of failure from single-node cuttings in many species, since there is no backup and no bulwark against infection. Usually when we propagate plants in the nursery, we use at least two nodes and often three.
Perhaps sugarcane is different? We had to hunt and see!
The first video I found was from Jag Singh, in which he experimented with starting a few single node cuttings as a side quest to his main propagation method… and they took.
Then I watched this video from Hutsady K, in which he compares rooting cane chunks with developed shoots in water and in soil.
Okay, now we had some info. Since some of my cane was from rare varieties, and because we wanted to find the very best way to propagate sugarcane for maximum return of plants produced per cane, as that made economic sense from a nursery perspective, we tried multiple propagation methods.
We tried one-node, two-node and three-node sugarcane cuttings planted upright in soil, and in water.
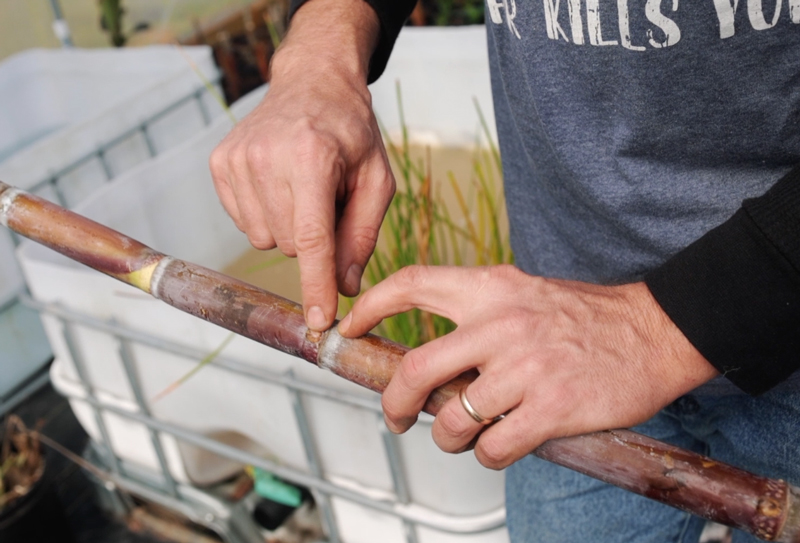
This is a stalk of sugarcane, and I’m pointing out what a growth node looks like:
We also did a round of cuttings where we laid one-node, two-node and three-node cuttings on their sides in a bin of soil, planted about 1″ beneath the surface.
Then, a little over a month later, we compared results.
Rooting Sugarcane Cuttings in Water
Since we had a good bit of cane to root, it made sense to cut up our pieces and stick them all into a single container of water, rather than putting each piece of cane in a glass, as you’ll see on YouTube propagation videos.
My solution was to put them all right-side-up in an old pot, then to set the pot in water that was about 5″ deep.
They did well this way, with most of the cuttings rooting and starting to grow within a few weeks.
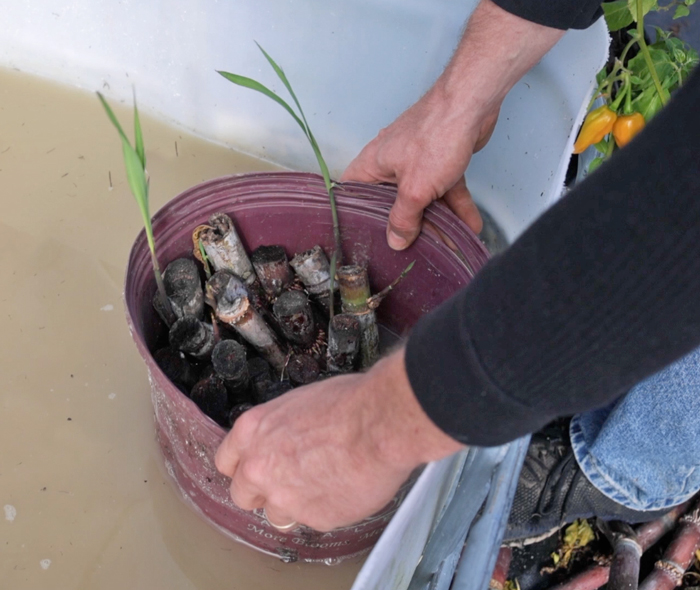
The three-node, two-node and single-node cuttings all did well, with only a few losses.
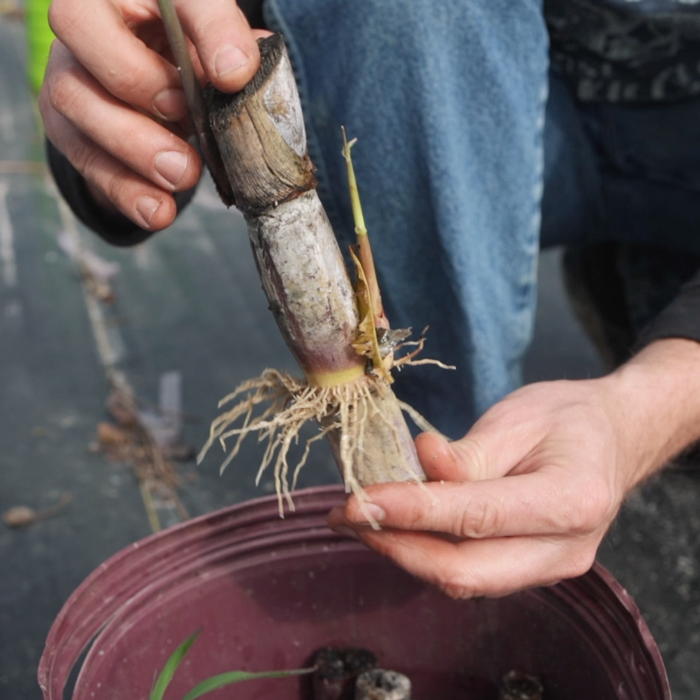
You can see the thick white “water roots” on this two-node cutting.
Rooting in water definitely works.
Rooting Sugarcane Cuttings in Soil (Vertically)
Our second experiment was to plant sugarcane cuttings upright in soil, in one-node, two-node, and three-node configurations.
We just used homemade potting mix, which is a combination of pine bark chips with a little sand, plus composted peanut hull waste and some half-rotten pine chips from a sawmill.
We filled a large pot with about 6″ of soil and stuck in cuttings, then topped it off with a little more dirt.
Most all of them rooted.
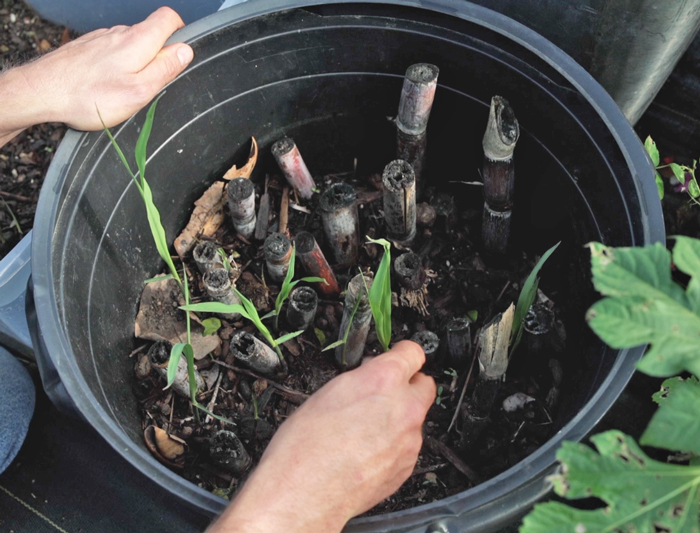
The roots on these were better than those on the water-rooted cuttings.
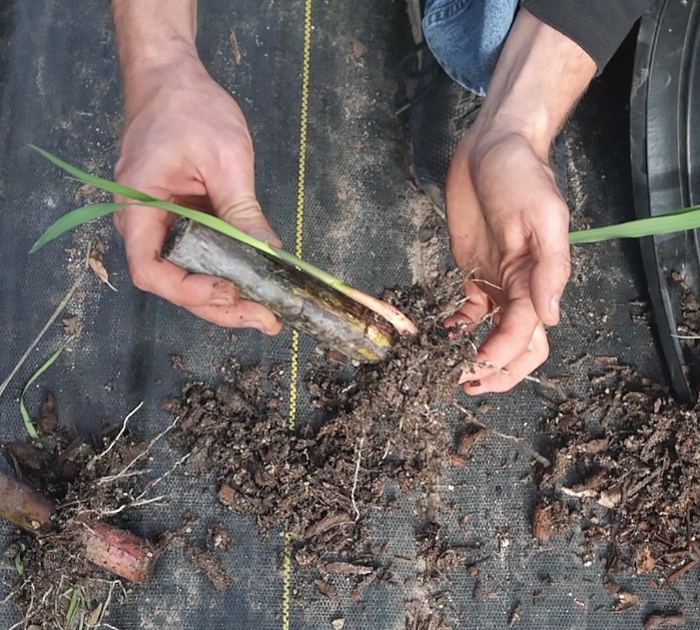
The roots are denser, with lots of side shoots.
Rooting Sugarcane Cuttings in Soil (Horizontally)
Our last experiment with rooting sugarcane cuttings was to plant them on their sides in a bin of soil, buried about 1″ beneath the surface.
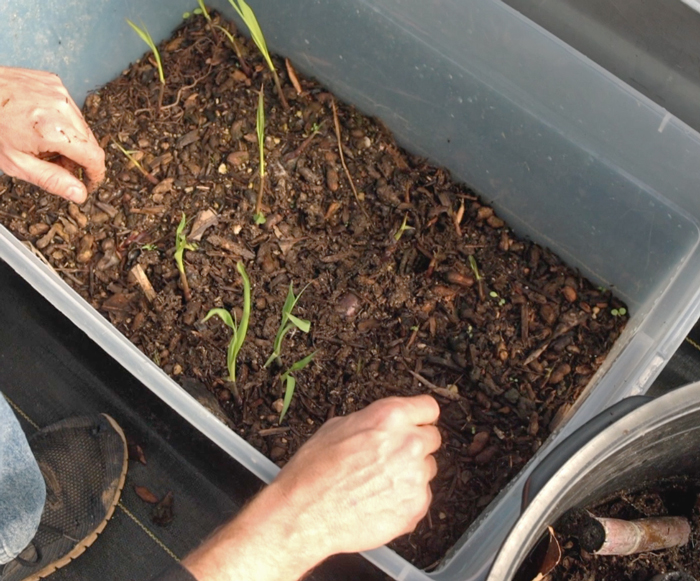
These also rooted well.
When I pulled a three-node cutting to check the root development, it looked excellent:
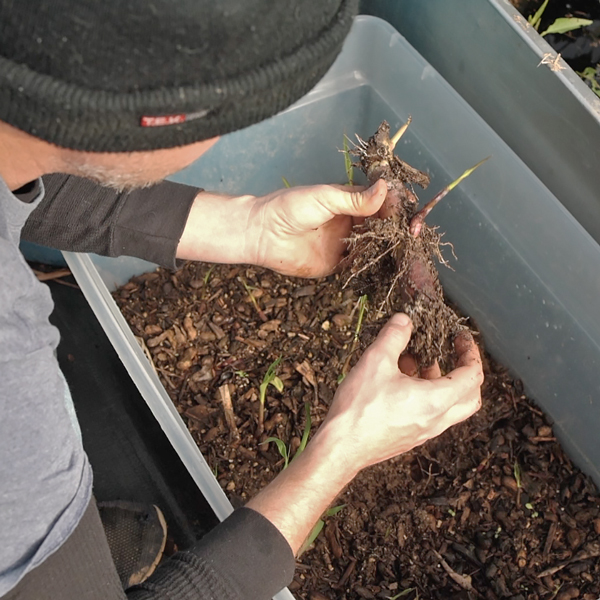
These are harder to put than vertical cuttings, however, so we’ll be sticking to those in the future.
The New DTG Approved Method of Rooting Sugarcane Cuttings
From now on, I will be using single-node sugarcane cuttings and rooting them in soil.
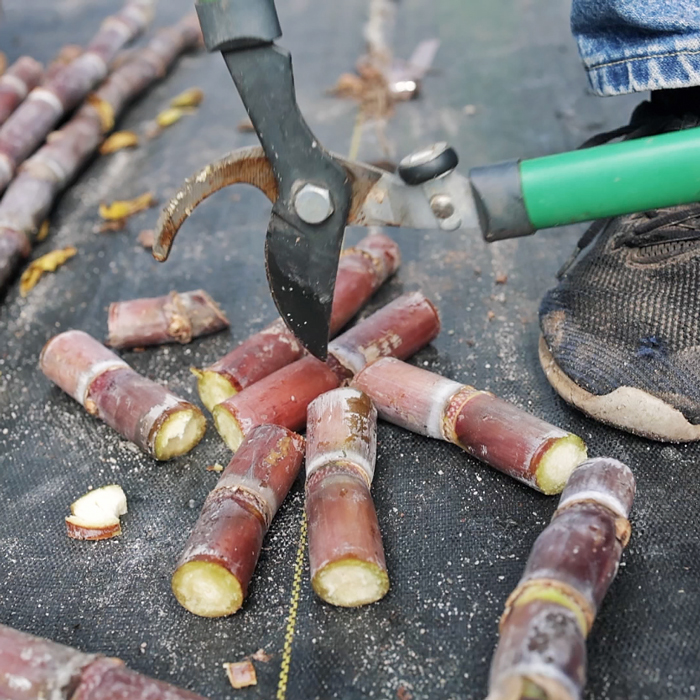
We may simple plant them directly into individual pots as well, since we had such a high success rate that we could skip the transplanting process already and grow them right where we want them to be.
As it is, we’ve transplanted almost all of the sugarcane starts from this experiment so we can offer them for sale in the spring.
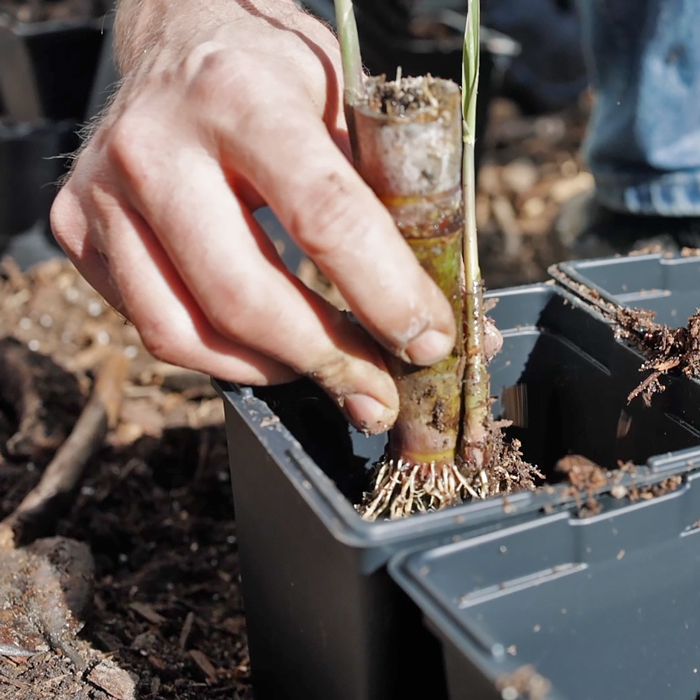
The rooting rate in the nursery was higher than we get from planting multi-node cuttings in the ground in the fall. If you have a colder climate or need to start a lot of sugarcane plants, I highly recommend using single-node cuttings in soil to ramp up your production.
Yesterday I posted a video on this experiment, so you can see exactly what we did and how we did it.
Thanks for watching!
More Resources on Sugarcane Propagation
Posts on Sugarcane at The Survival Gardener: https://www.thesurvivalgardener.com/?s=sugarcane
Water rooting of sugarcane from Jag Singh at Daisy Creek Farms:
Hutsady K experiments with rooting sugarcane in water and soil:
Deep South Homestead has multiple videos on sugarcane.
Totally Crazy Easy Florida Gardening also covers sugarcane on a backyard scale.
Subscribe to our newsletter here: https://thesurvivalgardener.us3.list-manage.com/subscribe/post?u=d1c57e318ab24156698c41249&id=1f74a21dc8


3 comments
Hello David. Ash here from Perth, Western Australia. Long time following your work.
Like you I wanted the most from my sugar cane so I plant single node cuttings in small pots, when they have developed enough to pot up i plant them a bit deeper so they produce more roots. I get results this way, also I have made a flat shallow pond with a big tarp and this is where I put some of my potted plants to save watering. Banana and sugar cane love it and it helps keep the humidity up.
I grow a lot of sugar cane with mexican sunflower and make my own version of your fetid swamp water, it smells really good too !
As these two plants are too wet and fibrous for the mulcher, I lay all my cut materials on the lawn and run over it with the mower. Either use fresh as mulch or ferment in large drums of water.
Not done any testing to compare against fertiliser or other home made products but everything seems to be healthy looking.
Anyway, keep up the good work and thanks for all you do.
This was very helpful! I enjoy and appreciate your posts. Thank you.
Great article David! So grateful for your wisdom.
Comments are closed.