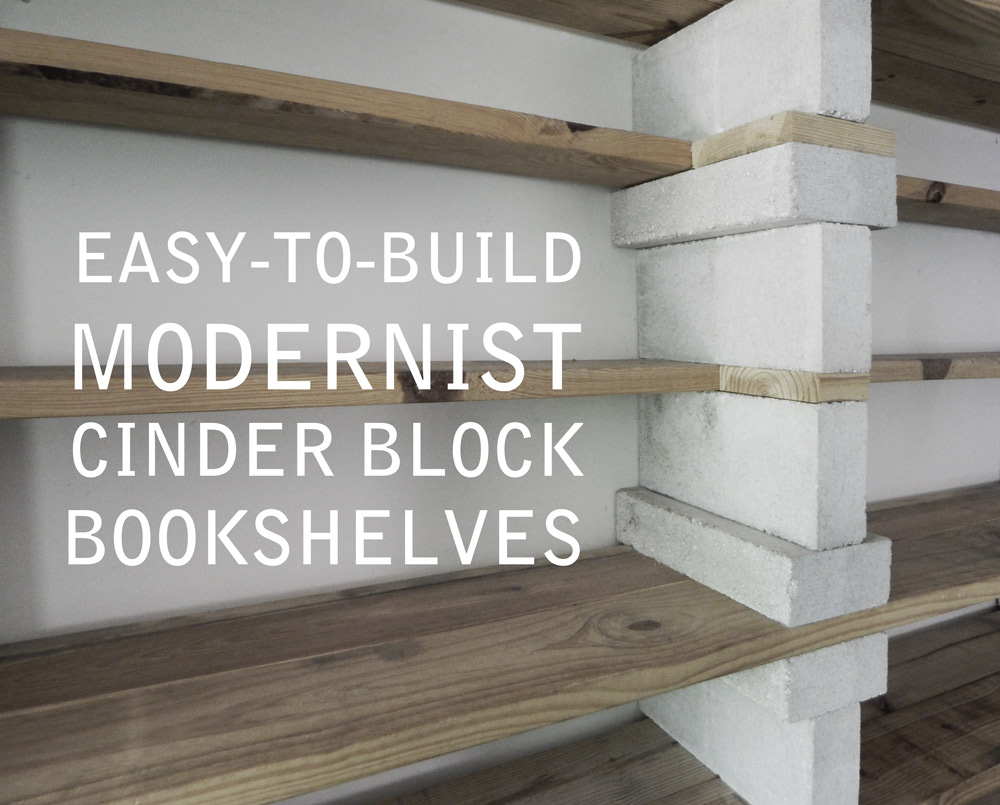
I’ve been meaning to share photos of my cinder block bookshelves for a long time but I didn’t get around to documenting my design until the very last minute.
This is mostly because the bookshelves were covered with books, vintage Star Wars action figures, liquor, paper and pencils, jars of seeds, baskets, lanterns, assault rifles, etc. etc. etc…
When we emptied out the house in preparation for our move, it was finally time to film a video and take some pictures for you.
Cinder block bookshelves are usually pretty ugly affairs. They often look cheap and chintzy, but it doesn’t have to be that way.
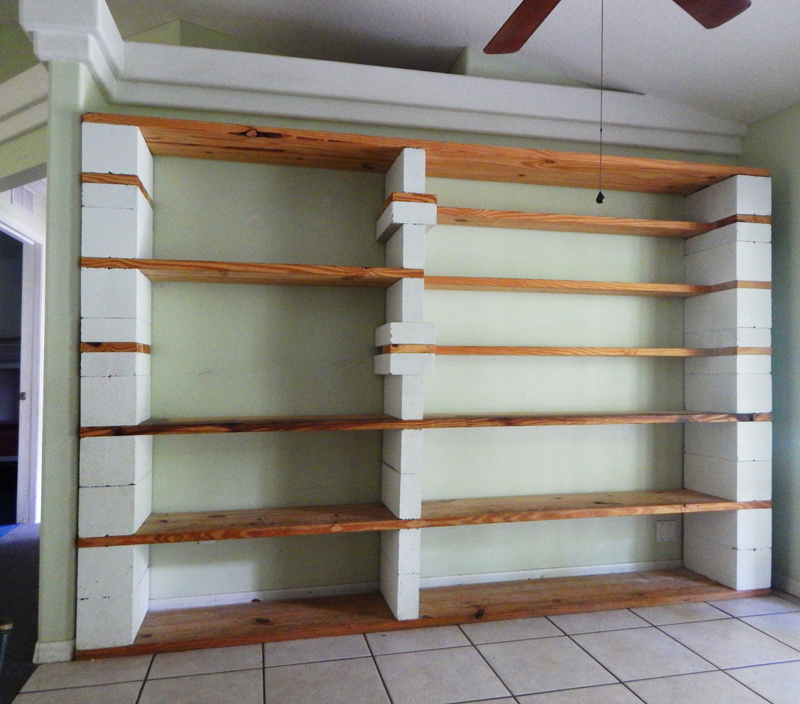
I built this concrete block book shelf for less than $100.00:
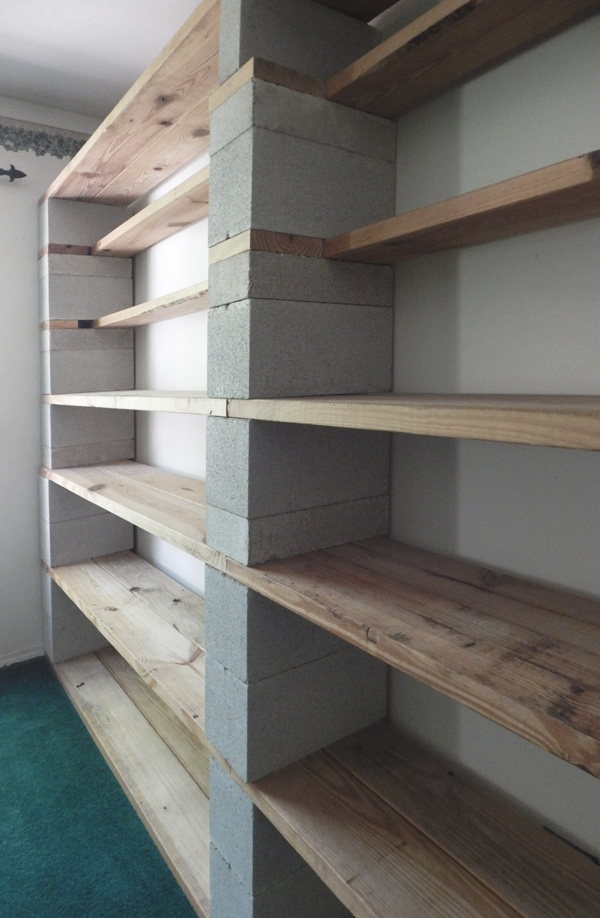
And I built this second one for my office:
How To Build Cinder Block Bookshelves (The Nice-Looking Way)
The big problem with most cinder block shelves is that the ugly side of the concrete blocks faces outwards. The rough holes in their centers will always look rough and cheap.
Lay them on their sides, however, and the look improves greatly.
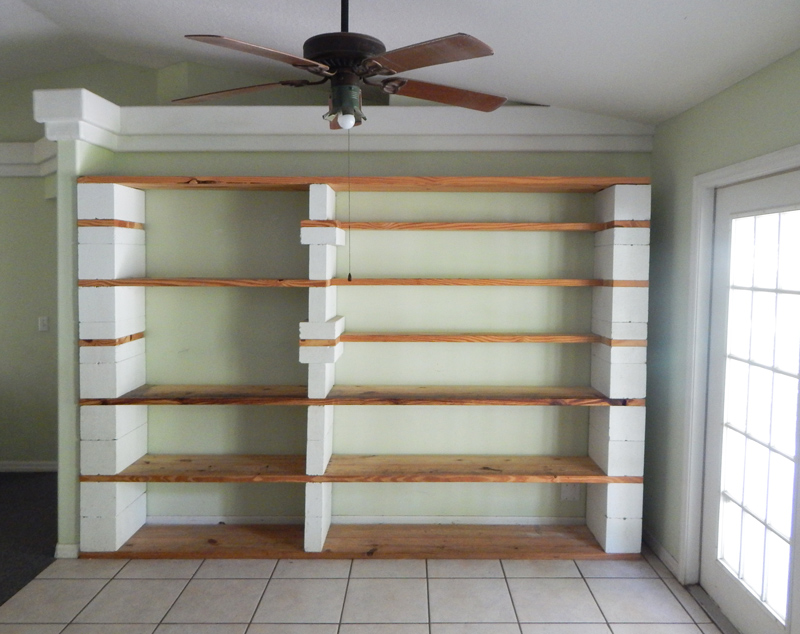
All you need for this project are a few easy-to-obtain items and one tool. Two tools, if you decide to paint.
Materials:
Cinderblocks (as many as desired, both solid half-blocks and full size)
2×8 pine boards
Paint (optional)
Paintbrush (if you decide to paint the blocks)
Miter saw (or a hand saw, if you need a workout)
If you stack two full-size cinder blocks on top of each other, as I do on the bottom shelves of these cinder block book cases, you end up with a 16″ space between shelves. This is bigger than you need for most books but is great for storing boxes or baskets that contain other items.
The block-and-a-half size shelves hold most books nicely.
Single block depth shelves are only 8″ tall and work for storing small paperbacks and CDs/DVDs.
I didn’t let any of the pine boards extend more than 6′ without support, since I believe that’s running a risk of the shelves warping over time.
At 6′ spans I’ve had them hold for years without bending downwards in the slightest, even under the weight of many gardening books and other hardcovers.
I believe I used 10′ boards on the shelf pictured above, then cut the ones that didn’t extend the full width of the shelf with my handy Hitachi miter saw. I love that thing.
You can let some of the shelves only come half way to the front by using just one board instead of two, or you can put two 2x8s side by side for every shelf. I got fancy and even cut little pieces to fit the gaps and make it look neat with insets and changes in how I stacked the blocks, but you don’t have to do that.
On my next homestead I’ll likely do this exact same cinder block bookshelf design again. They work well, save you plenty of cash, plus they’re super stable thanks to their weight.


21 comments
Your cinder block bookshelves are genius and very affordable. I’m very impressed that you made something so classy out of something so ugly. Thank you for documenting your inspiring design for cinder block bookshelves. I think I may try this on a smaller scale in my little library room.
Thank you.
I’m remodeling my bedroom this year. I plan on making this bookcase soon. I like it because if I want a TV on one of the shelves later on all’s I have to do is remove a shelf. I have boxes of books and this bookcase will work perfectly!
Thank you, Denine – send a picture when you build it – I would love to post it here!
[…] Shelving Unit […]
[…] Shelving Unit […]
[…] Shelving Unit […]
Hi David
I love these shelves and am going to make them.
My questions: what kind of paint did you use? Did you have to use a sealer paint as a first coat? Maybe a Kilz brand made for masonry? How many coats did you have to apply to get it to look like your pics?
I am placing this unit on a laminate floor. Will I will want to have a felt type material under the bottom board to protect the floor?
Thank you!
Hi Irene,
Thank you. I used semi-gloss white house paint. No primer required, just a couple of coats. It sticks very well to concrete.
I would probably put a little felt or even cardboard beneath the blocks on a laminate floor. Mine was on tile so I didn’t bother with anything.
Glad you enjoyed it and I would love to see pictures of what you come up with when you’re done!
[…] Shelving Unit […]
Thank you to share this idea. It looks clean, nice and functional. I’m moving to the rental home for 2 years. There is no shelf in the garage and I need lot of shelfs for my stuffs which I plan to unpack until our home is finished. I will used it to store my boxes not books. I plan to use 2’x8’ plywood and put cardboard underneath to keep the floor clean after I moved out. My questions is;
Did you use any cement glue or anything to attach plywood and cement? If so, please advise.
Thanks again to sharing this project. I will post the pictures after my is done.
You mentioned how stable the shelves are. Does the weight of the blocks keep the shelves from toppling over when they are loaded with books?
Yes, that’s right. They don’t move at all. It also helps that they’re deep.
[…] .ub541021c142b66a4d5c59d8747ae0660 { padding:0px; margin: 0; padding-top:1em!important; padding-bottom:1em!important; width:100%; display: block; font-weight:bold; background-color:inherit; border:0!important; border-left:4px solid #27AE60!important; box-shadow: 0 1px 2px rgba(0, 0, 0, 0.17); -moz-box-shadow: 0 1px 2px rgba(0, 0, 0, 0.17); -o-box-shadow: 0 1px 2px rgba(0, 0, 0, 0.17); -webkit-box-shadow: 0 1px 2px rgba(0, 0, 0, 0.17); text-decoration:none; } .ub541021c142b66a4d5c59d8747ae0660:active, .ub541021c142b66a4d5c59d8747ae0660:hover { opacity: 1; transition: opacity 250ms; webkit-transition: opacity 250ms; text-decoration:none; } .ub541021c142b66a4d5c59d8747ae0660 { transition: background-color 250ms; webkit-transition: background-color 250ms; opacity: 1; transition: opacity 250ms; webkit-transition: opacity 250ms; } .ub541021c142b66a4d5c59d8747ae0660 .ctaText { font-weight:bold; color:#3498DB; text-decoration:none; font-size: 16px; } .ub541021c142b66a4d5c59d8747ae0660 .postTitle { color:#2980B9; text-decoration: underline!important; font-size: 16px; } .ub541021c142b66a4d5c59d8747ae0660:hover .postTitle { text-decoration: underline!important; } También te puede interesar: 9 relojes decorativos que querrás tener en tu casa ¡No te los pierdas!Fuente: The survival gardener […]
Beautiful! Just two questions. First, is this stable enough to do floor to ceiling shelves? Second do I have to mortar the cinderblocks together? I have a room that I want to make my library. The wall I want this to go on is about 10 feet wide, + or – 7 feet tall {it’s at an angle}, and 1 foot deep. Is that too big to be stable? This room faces a road and I’ve been told I can’t have floor to ceiling shelves because the cars driving by will “move the shelves,” what are your thoughts on this? Thank you!
Yes – very stable thanks to the weight. You don’t have to mortar the blocks. I would put spacer blocks at the center to keep the boards from sagging. These are super stable when installed. I’ve done them on both wood and concrete floors.
I read that you used a span of 72″, and I wanted to ask if you know what the span limit would be for 2x8s on blocks? I am building something similar and was thinking about making it around 78″ wide.
Thanks for posting these pictures. It takes me back to the 1970s when hippies and college students used them for various things. I still like them to this day.
Thanks, Rosalind.
Hola es genial la idea .
Preguntas. Como se sostiene la madera con el bloque de ladrillos?
Y como encastraste cada madera con el.bloqe
El peso soporta los estantes. Obtuvimos madera estándar y bloques de hormigón y los combinamos en la tienda para que encajaran.
Comments are closed.