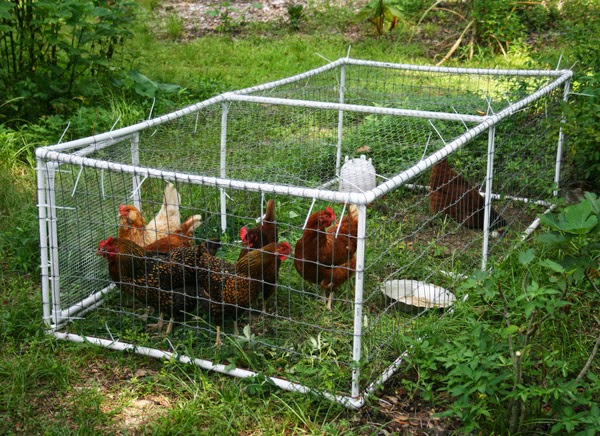
Yesterday we butchered our first round of Red Broiler chickens. We have 65 to butcher, but only did 15 of the fattest ones yesterday.
These birds have taken much longer to raise than Cornish Cross. We got them at the end of October and they seem to take forever to fatten up. We’ll see if the meat tastes better.
Our Butchering Setup
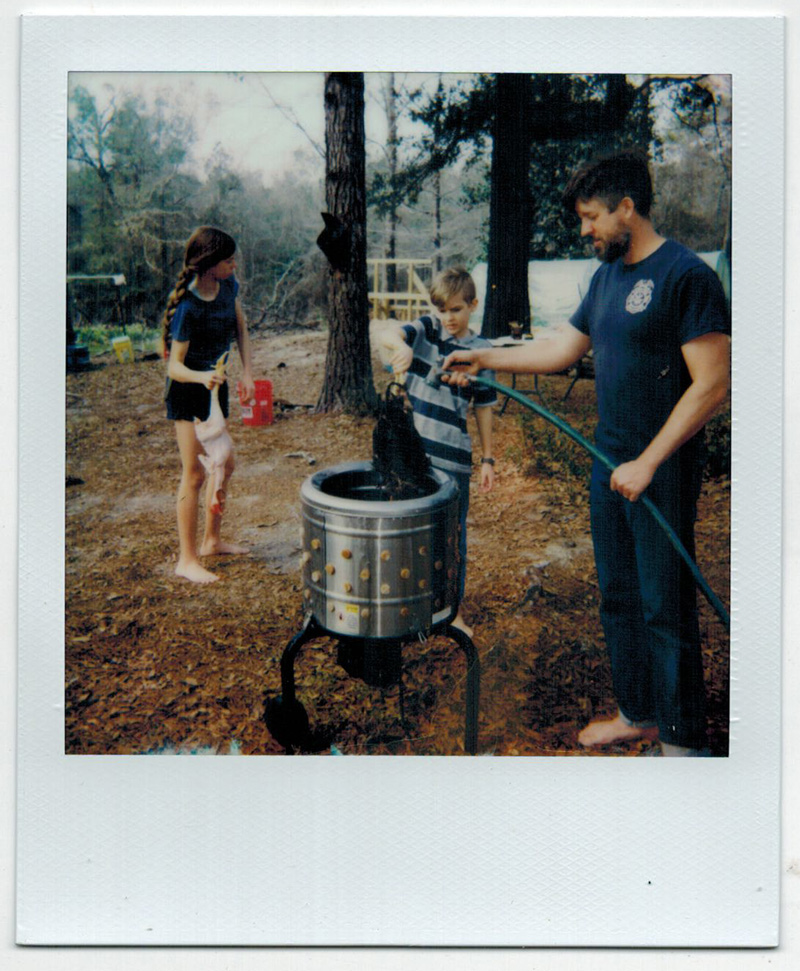
First, we set up a table and made a killing cone from an old plastic plant pot. The killing cone was screwed to a pine tree. Then we built a small fire and put an 8-gallon cast iron pot on it, filled with water which we could use for scalding. After that, I set up a chicken plucker we borrowed from Randall at FloraBama Homestead. We dragged out an extension cord and the hose to operate it. We also sharpened and honed our knives.
Once the water was hot enough (150 degrees F), we were then ready to butcher.
Step 1: Killing Chicken
Put the chicken upside-down in the cone and hold him there with his head through the bottom. Then, using a sharp knife, slit his throat and let him bleed out. If you do this right, you won’t even hear a squawk. The chicken will flop around for a while, though, as chickens are wont to do.
In the past I have killed birds on top of a log using a machete. The killing cone method is somewhat less dramatic and a bit safer.
Step 2: Scalding Chickens
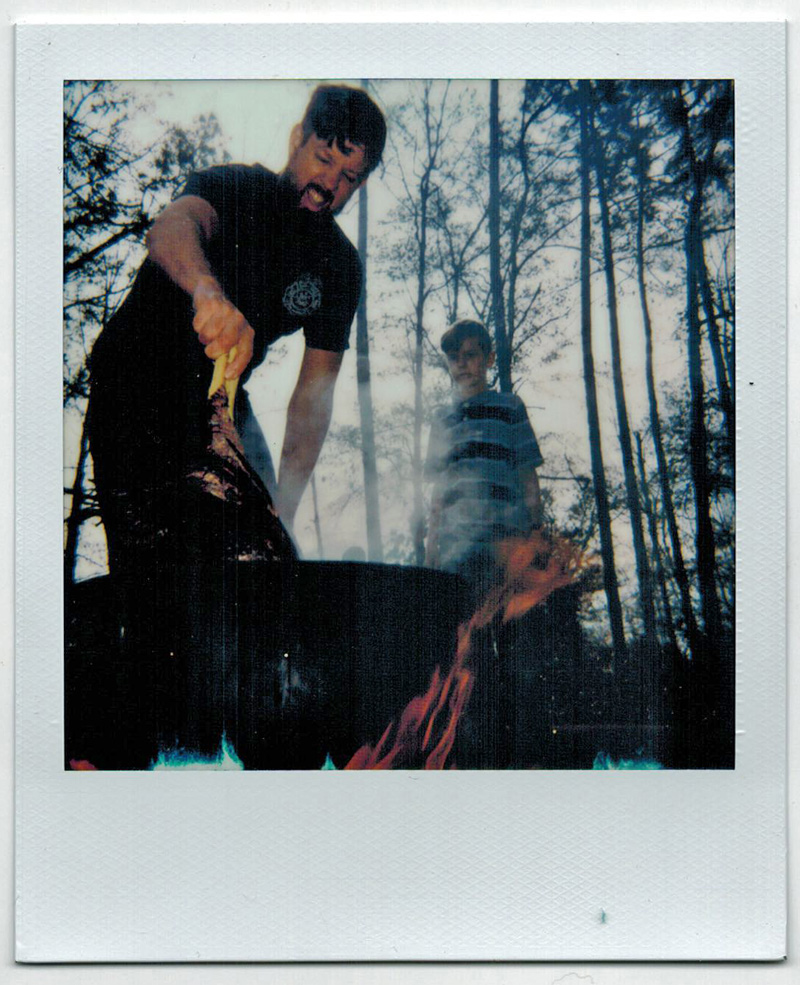
Take your dead chicken by the legs and swish him around in a pot of 150-degree water. This cauldron worked quite nicely. If it was too cold, we put more sticks beneath it. Too hot, we sprayed in a bit of cold water from the hose. We twirl the chicken around in the water for about a minute.
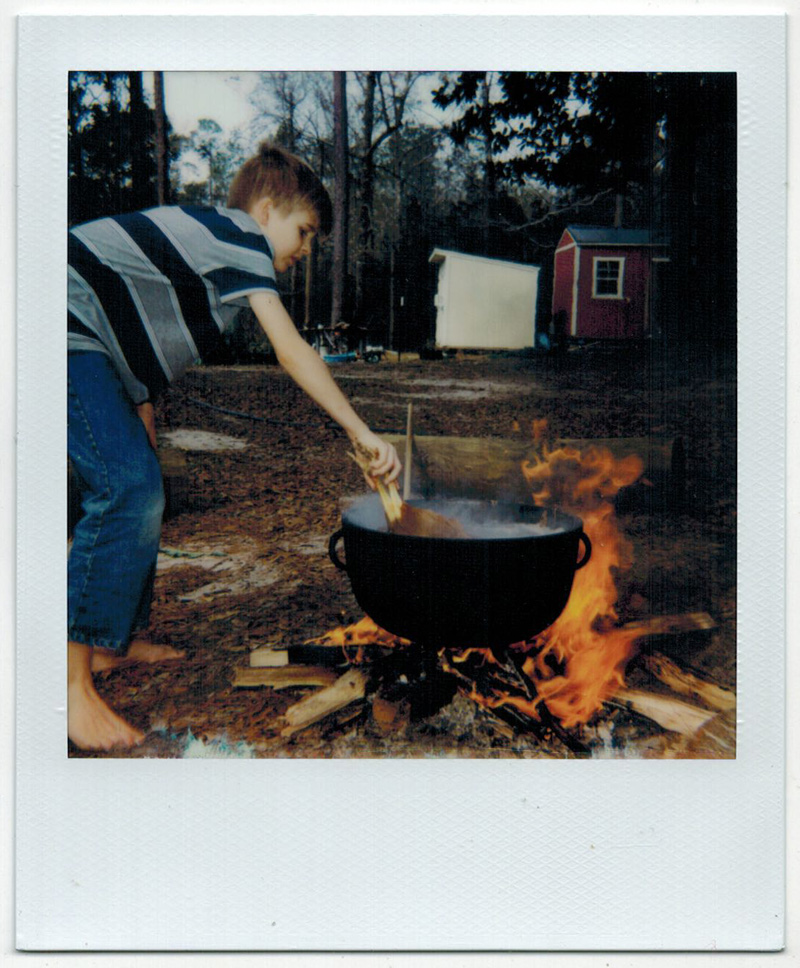
After the chicken is good and scalded, it’s time to pluck.
Step 3: Plucking A Chicken
With a chicken plucker like this barrel model, you just turn the thing on and drop in the chicken. Spray in water as the chicken bounces around and, if you scalded properly, the feathers are all off it in seconds. If your scalding time was too short or if the water was too cold, the feathers won’t come off easily. If you scald for too long or at too hot of a temperature, the skin of the chicken will rip off along with the feathers. We had both things happen with our birds until we got it right.

We also discovered that the birds pluck better in the plucker if their feet are removed first (at the knee). Leave the legs on before scalding so you can hold the bird in the water, then take them off before plucking. Save the chicken feet for stock – they make excellent broth!
In the past, we always plucked birds by hand, sometimes with friends.
This plucker saved a lot of time but they are expensive. Borrow or share one if you can.
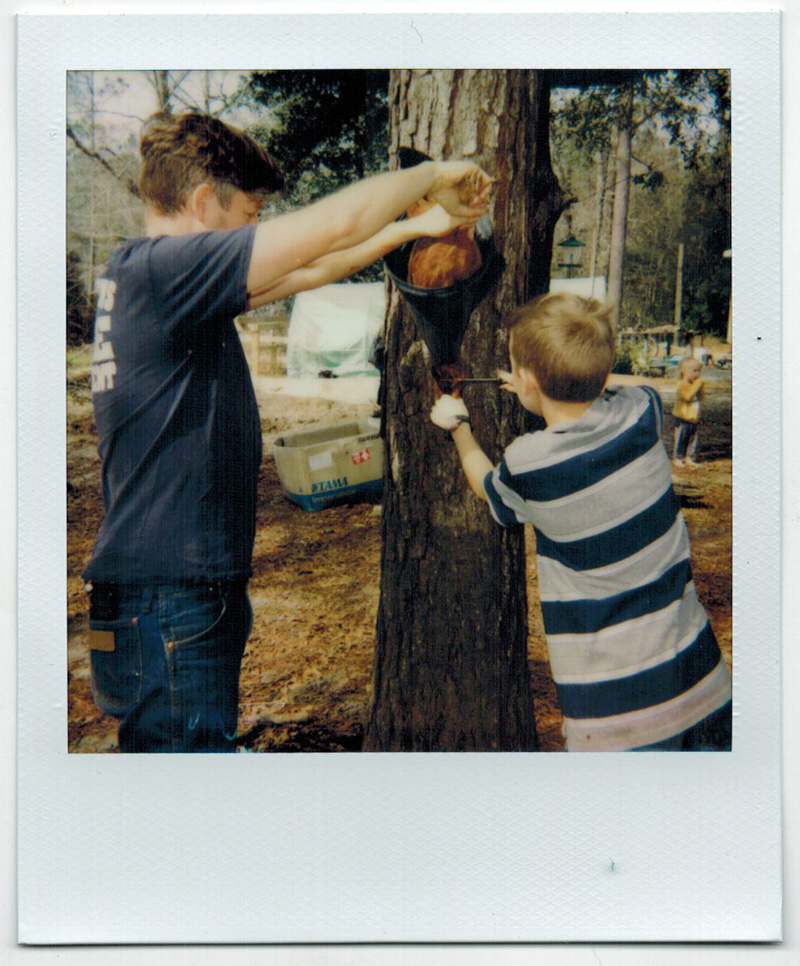
Step 4: Gut the Birds
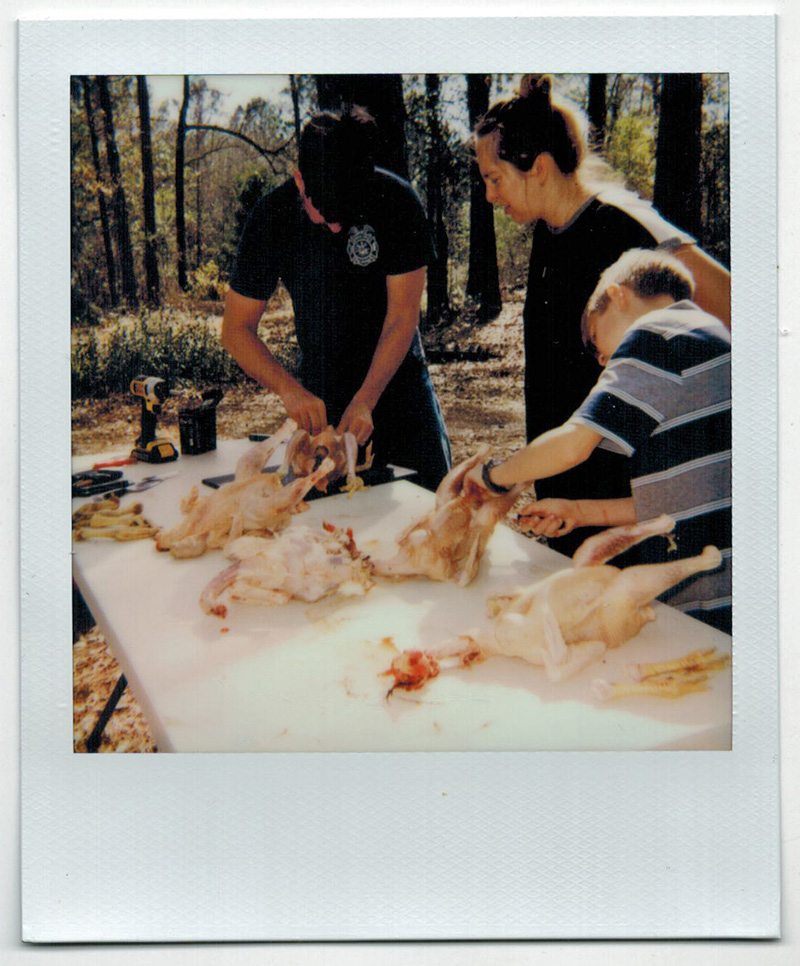
Cleaning a chicken isn’t hard, but it takes some practice. You need to remove the head and the crop (at the neck), and then slit into the abdominal cavity and take out the guts, being careful not to slit the intestines. I cut just under the rib cage first, taking out the guts carefully with my hand until the innards are free except the end of the intestines, which attaches to the vent of the bird. Then I cut the whole vent/tail off. We save the livers and the hearts to eat later, carefully removing the gall bladder from the liver so it doesn’t break and taint the meat.
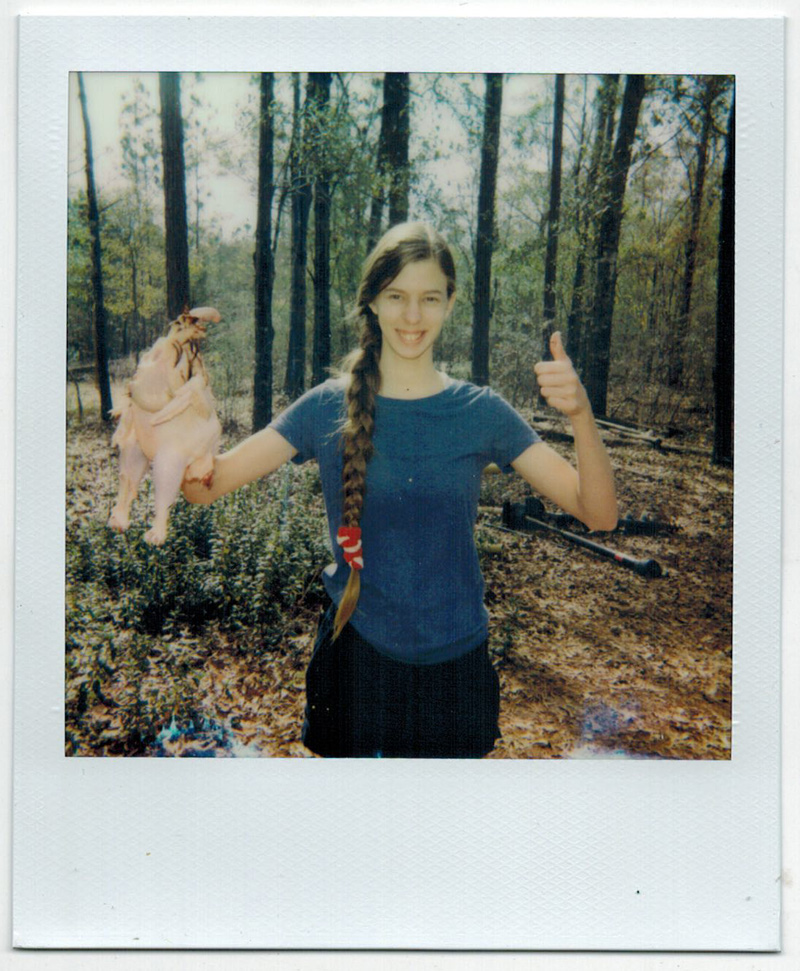
A finished bird:

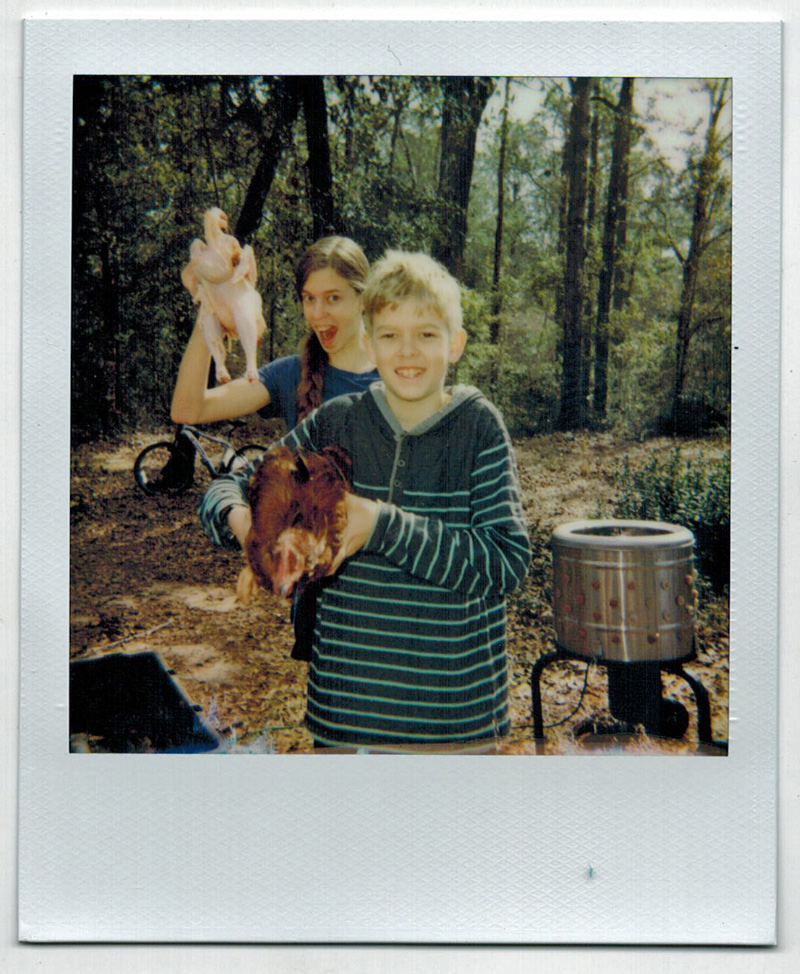
All that needs to happen now is for the final feathers to be plucked off the outside and the bird to be blasted out and off with the hose as a final cleaning.
Bird in foreground is about to be dispatched, the bird in the background is finished and ready for the final step.
Step 5: Chilling Chickens
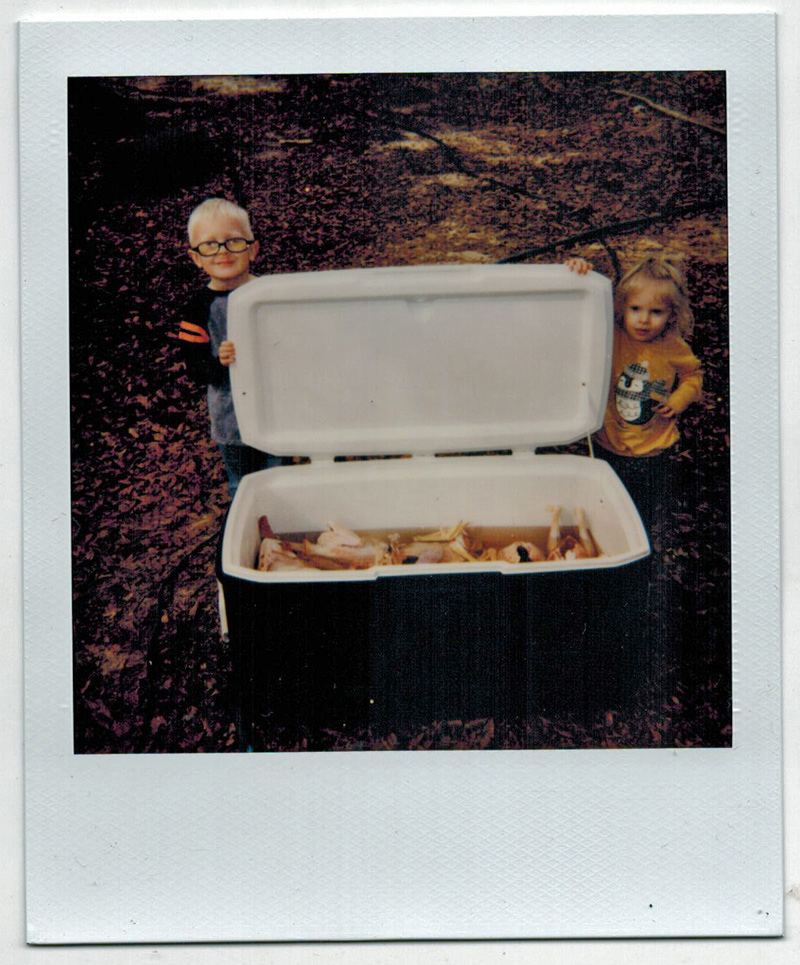
The last step after cleaning is to chill the birds in a cooler of ice water. We let them sit in cold water for a few hours, then Rachel puts the carcasses in freezer bags and packs them away in the chest freezer.
Backyard chicken butchering takes some getting used to, but it’s a good family project. Our birds were raised outdoors on the ground and fed non-GMO feed. The entire process of raising and butchering is a thousand times better than the factory farming system where birds are crowded indoors on concrete and fed garbage GMO food and antibiotics before being machine slaughtered and sprayed with chemicals. That chicken tastes like garbage to me and I don’t buy it.
If you can raise your own, you will taste what chicken is supposed to taste like. I could never go back.
As for the Red Broilers, I don’t think they’re a good financial alternative to Cornish Cross birds, time and feed-wise, but if you had a big pasture to raise them on, they might be worth it. We’ve spent a lot of time and effort moving a chicken tractor around for some rather scrawny birds. We’ll keep fattening the rest for a couple of weeks, but I am not all that impressed. I will, however, mix some of these larger meat-bird genes into some of my flock to see if we can get some fatter birds that are a decent dual-purpose type.
We’ll see what they taste like, though. If they taste better than the Cornish Cross monsters, I may do them again.
Ultimately, I would like a continuous supply of chickens that doesn’t rely on weird hybridization processes at faraway hatcheries. That may take some breeding. The Red Broilers don’t die of heart disease like their bloated CC cousins, and that’s a good thing.

9 responses to “Butchering Chickens: First Time Raising Red Broilers”
Love the pics!
Yeah, heritage birds take a long time to grow out too, but so much tastier and when you grow and butcher it yourself it isn’t mushy meat that smells vaguely like bleach and chicken poop. Cornish Cross is like hybrid vigor with Dr. Frankenstein in charge.
That’s exactly right. Bleach and poop. I could never stand chicken, even as a kid, until I had it from a friend’s farm and my eyes were opened.
I suspect that one can have wily free range birds or fast-maturing meat birds, but not both. It would be very surprising if going back to the old ways of chicken keeping could also keep pace with modern appetites and needs, all while hatching and raising your own new flock members. I love the article at https://www.americanheritage.com/chicken-story and was shocked that it’s only very recently that chicken was common and cheap. And as David says here, the secret is industrial agriculture with all its cruelties.
That said, hanging up your hat and saying “well I guess it can’t be done” is simply not the DTG way. So keep taking us along!
That is a great article – very interesting.
Thanks for documenting. I have a laying flock of free-range Icelandic chickens. They readily go broody, and when we let them raise chicks, we usually have a handful of cockerels that we slaughter at about 3-4 months of age. They are generally small-carcassed and not very meaty (even a mature rooster), but they taste great. I think the best way to use them is low/slow with some moisture, like in a crock pot. You get every scrap of meat off the carcass and some good broth. They don’t really make sense if you want to raise chicken for the big meaty breasts, thighs, or wings like you’d buy in the grocery store. We’ve also raised Cornish Cross specifically for the meat, and while great, they only really make sense as long as we have access to cheap and abundant feed. So we raise an utilize both a scrappy, low-maintenance breed for eggs (and incidental meat), and high-maintenance breed for meat. If things got tough, I think we could conceivably raise a good bit of poultry meat with our Icelandics. We’d just have to adjust our expectations and meal planning to focus more on using low/slow-cooked meat instead of the giant meaty pieces like you’d find at the grocery.
Yes, that really makes sense. My wife saves all the bones for broth as well – you really can get a good bit of use out of a scrawny chicken that way.
Can we talk more about what breeds we can mix to get a bigger bird???
And food we can grow for chickens and livestock like goats.